Getting Started: Data Connections
The quickest way to learn how to connect is to watch this 2 minute tutorial video. To make sure your connection details are saved, click the Log Off button at the end of your first session in Finamark. Keeping Data Sync checked in the login menu will recall your connection for you, from then on.
How To Connect:
Before you begin using your Finamark Systems platform, you must connect to one or more data feed providers. Without this you will not be able to get price data, make trades or operate the platform. Upon your first login the Data Services menu will open automatically to help get you started.

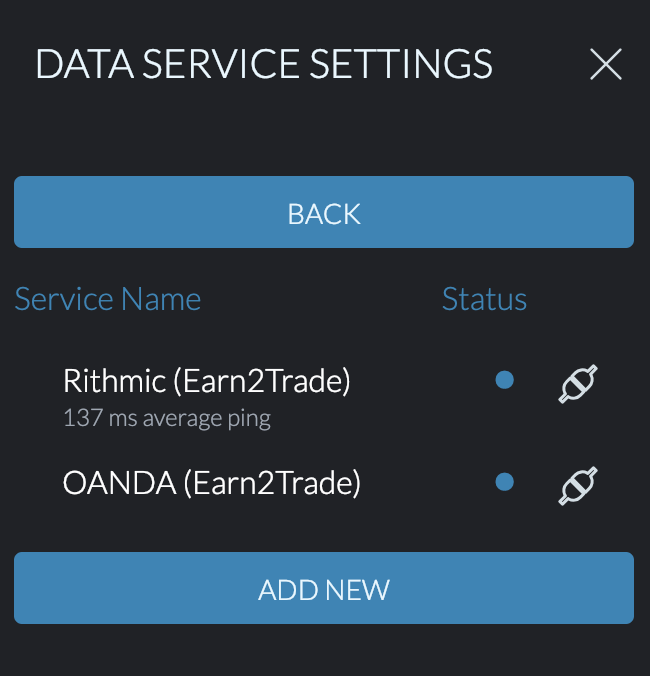
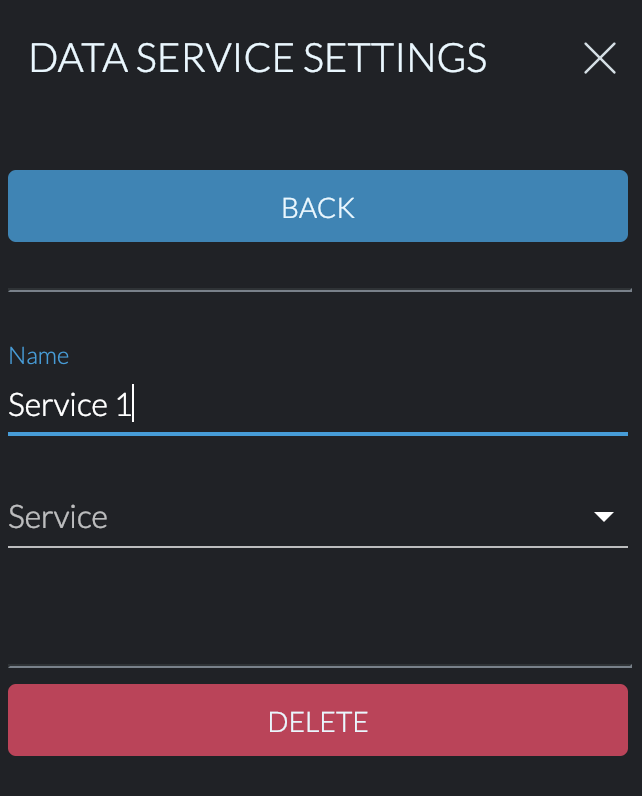
To find this menu manually, click Settings on the top bar of the platform, and select Data Service Settings. This will display all your connection services and their status, and allow you change that status between connected or disconnected. You can click on any connection on this menu to open its settings page to edit it. You may also remove any connection with the red Delete button at the bottom of its settings page. You can also click the plug icon in the bottom left of the platform to reach the menu quicker.
Here is the step by step process for setting up a new data connection:
- In the Data Service Settings menu, click on the blue Add New button to create a new connection page. You will see a new connection row appear on this menu, called "Service 1" (or a higher number if you had connections present already).

-
Click on the new Service you just created to open its settings page for editing. The first row on this page is called Name and will have the default name such as Service 1. You can click on that default name to rename the connection.
-
The next row is called Service. Click here to open a dropdown list of the currently available data feed providers. Select the provider you want for this connection.
- Depending on the service you chose in Step 3, more fields will appear relevant to that service. In this readme, click the service you chose in Step 3 on the menu on the left (under Getting Started: Data Connections), and follow the instructions of that section.
After finishing those steps for your provider in Step 4, you are ready to connect. Simply click the blue Connect button. You may also connect via the list of connections from now on by using its plug icon, or the connections plug icon in the bottom left of the platform. Click the blue Back button at the top to exit this menu and return to the list of connections.
When the service is properly connected, the colored Status dot for the service in the list will be blue, and the plug icon beside it will show as plugged in. If it is not connected the dot will be red and you will see the plug unplugged, with the prongs out of the socket.\
You can also see your connection status via the color of the plug icon in the very bottom left of the platform. Hovering your mouse over this icon is a quick way to see all your connections.
Updated about 1 year ago